What post are you looking for?

Showing posts with label kids snacks. Show all posts

Tuesday, October 25, 2011

Disney Cars Party


When my youngest turned 4, he insisted on another Cars party.
Having two boys, this had to be the 3rd or 4th car party (some Hotwheels and some Disney Cars).
Keeping in theme, we held a garage party.

The guests decorated license plates when they walked in.
They were made of foam rectangles from the dollar store.
I punched 2 holes at the top and laced them with string so we all could wear them around the house.  

The next party station was Ramone's Body Art.
I tied the sign to the fire place grate and placed it in front of our school desk.
I had a bowl full of tattoos on top of the desk and another bowl to hold a wet rag.
A teenage neighbor operated this station and the children loved it!


I placed a sign in the hall entrance that gave the children a choice of their next destination.

Lightning McQueen's Piston Cup Playhouse was our playroom set up with all of my son's Cars toys.
  
Sally's Color Works was a coloring area in our dining room.
I found Cars coloring sheets online. 
After the children finished coloring they had the opportunity to decorate the garage with their art. 

At this point the children needed some fuel.
       Our convenience store station had drinks, cheese curls, Doritos, and traffic lights.
      (See end of post for recipe.)

The last stop was the garage, a.k.a. Flo's Cafe and the Radiator Springs Drive-In Theatre. 

We used tarps to divide the garage.
Tacky? Yes!
Appropriate to the theme? Totally!

For the Radiator Springs Drive-In Theatre I set up a TV and played the Cars movie.
(My kids cheated and started the movie while I was setting everything up!) 

Flo's Cafe:
I served sandwiches and apple slices in little paper sacks that had Cars stickers on them.
They enjoyed a Lighting McQueen birthday cake and ice cream during the movie as well.

After opening gifts, we moved the table to the side and pulled out a tire.
It was time for a good old fashioned bean bag toss!
The winner received a plastic trophy and all the children "won" their goodie bags.

The party was amazing and so simple!

Traffic Lights:
First, spread half of a graham cracker with icing.
(fyi: Pillsbury Vanilla is the best non-homemade icing!)
I added M&Ms, then refrigerated over night.
You can serve without placing them in the fridge, however they taste really good cold and it kept them fresh until the party.

Tuesday, October 18, 2011

Frankenstein pudding cups

These Frankenstein pudding cups are super cute and easy for kids to make.
(I imagine that they must be much tastier than the lime-jello version I've seen online!)

We used Jello color changing vanilla pudding (too cool!)
While the kids were doing their chores I drew the faces on four cups.
(Oh, the poor kids. Mama gets to color while they clean!)

Then I divided the pudding powder evenly into each cup. 

I had the kids measure a 1/2 of a cup of cold milk and let them add it in. 

They didn't have to stir for long, as it only takes about five minutes to get to the right consistency.

I let them eat the cream from a couple of Oreos, then they crushed up the cookies for hair.

Simple, easy, and very good!


Sunday, October 16, 2011

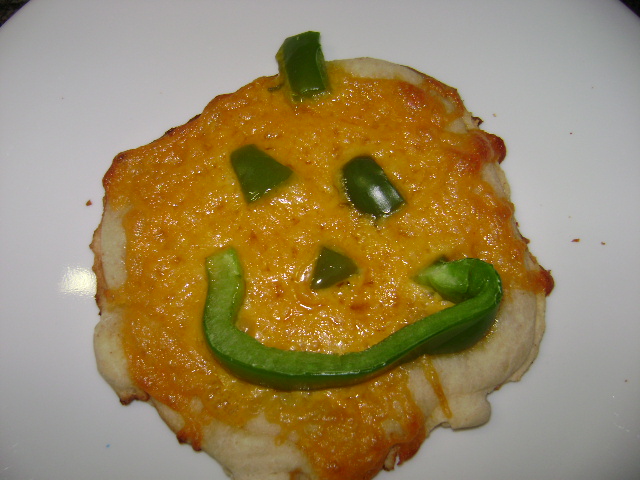
Halloween Pizzas

We got home late from shopping yesterday so supper had to be something quick and easy.
Using Pillsbury pizza dough (gasp! I didn't make it from scratch.) I cut out mini pizza crusts.
I used a pot lid as a guide.
I didn't have any sauce so the pizzas were pretty basic.
I added the cheese and sliced up the free bell pepper (see yesterday's post) to make the jack-o-lantern face.


 I baked them at 425 degrees for about nine minutes.
They came out pretty cute.
We served apple slices with them and the pepperoni balls seen below. 

Using the leftover dough, we made pepperoni balls. 


Monday, October 10, 2011

Monster bites


Looking for a ghoulish healthy snack that your little ones will gobble up?
---
To make this treat simply cut an apple into quarters.
Glue two of the quarters together with peanut butter.
For teeth: Break a few mini pretzels into small curved pieces and insert them halfway into the peanut butter. 
For eyes: Spread a dot of peanut butter onto two raisins and attach to the top apple quarter.
Add some bug hair (raisins) to top it off! 
---

Sunday, October 9, 2011

Cheesy monster fingers!

Halloween is just 3 weeks away and you know what that means...a sign up sheet!

Cheesy monster fingers have long been a hit with my children, their classmates, and their teachers!

They are extremely easy to make but do make sure you have set aside a good hour so that you don't rush.


Ingredients:
---
String cheese (a pack of 24 makes 48)
1 green bell pepper
Red food coloring
Just a little bit of cream cheese
A sharp pearing knife.
---
Directions:
---
Slice bell pepper into very small pieces. 
(Since these will be the monster's fingernails, feel free to cut them into triangles or a french manicure style!) 
Wearing gloves to avoid fingerprints, cut each piece of string cheese in half. 
Carefully cut slits into the cheese to resemble knuckles.
Next, cut a small indention at the top.
Smear a little cream cheese into the indention and place the fingernail, I mean bell pepper, on top!
For a finishing touch, dip the other end into a dot of red food coloring.
The cheese will asorb the color so it only takes a little.


So, this year, check OTHER!

Thursday, October 6, 2011

Little fishies.

This was a hit with the pre-k crowd. Blue Jello with Nemo fish gummies inside. The idea tied into their ocean life unit quite well and it definitely was a great alternative to cupcakes just before nap time!